
Overview
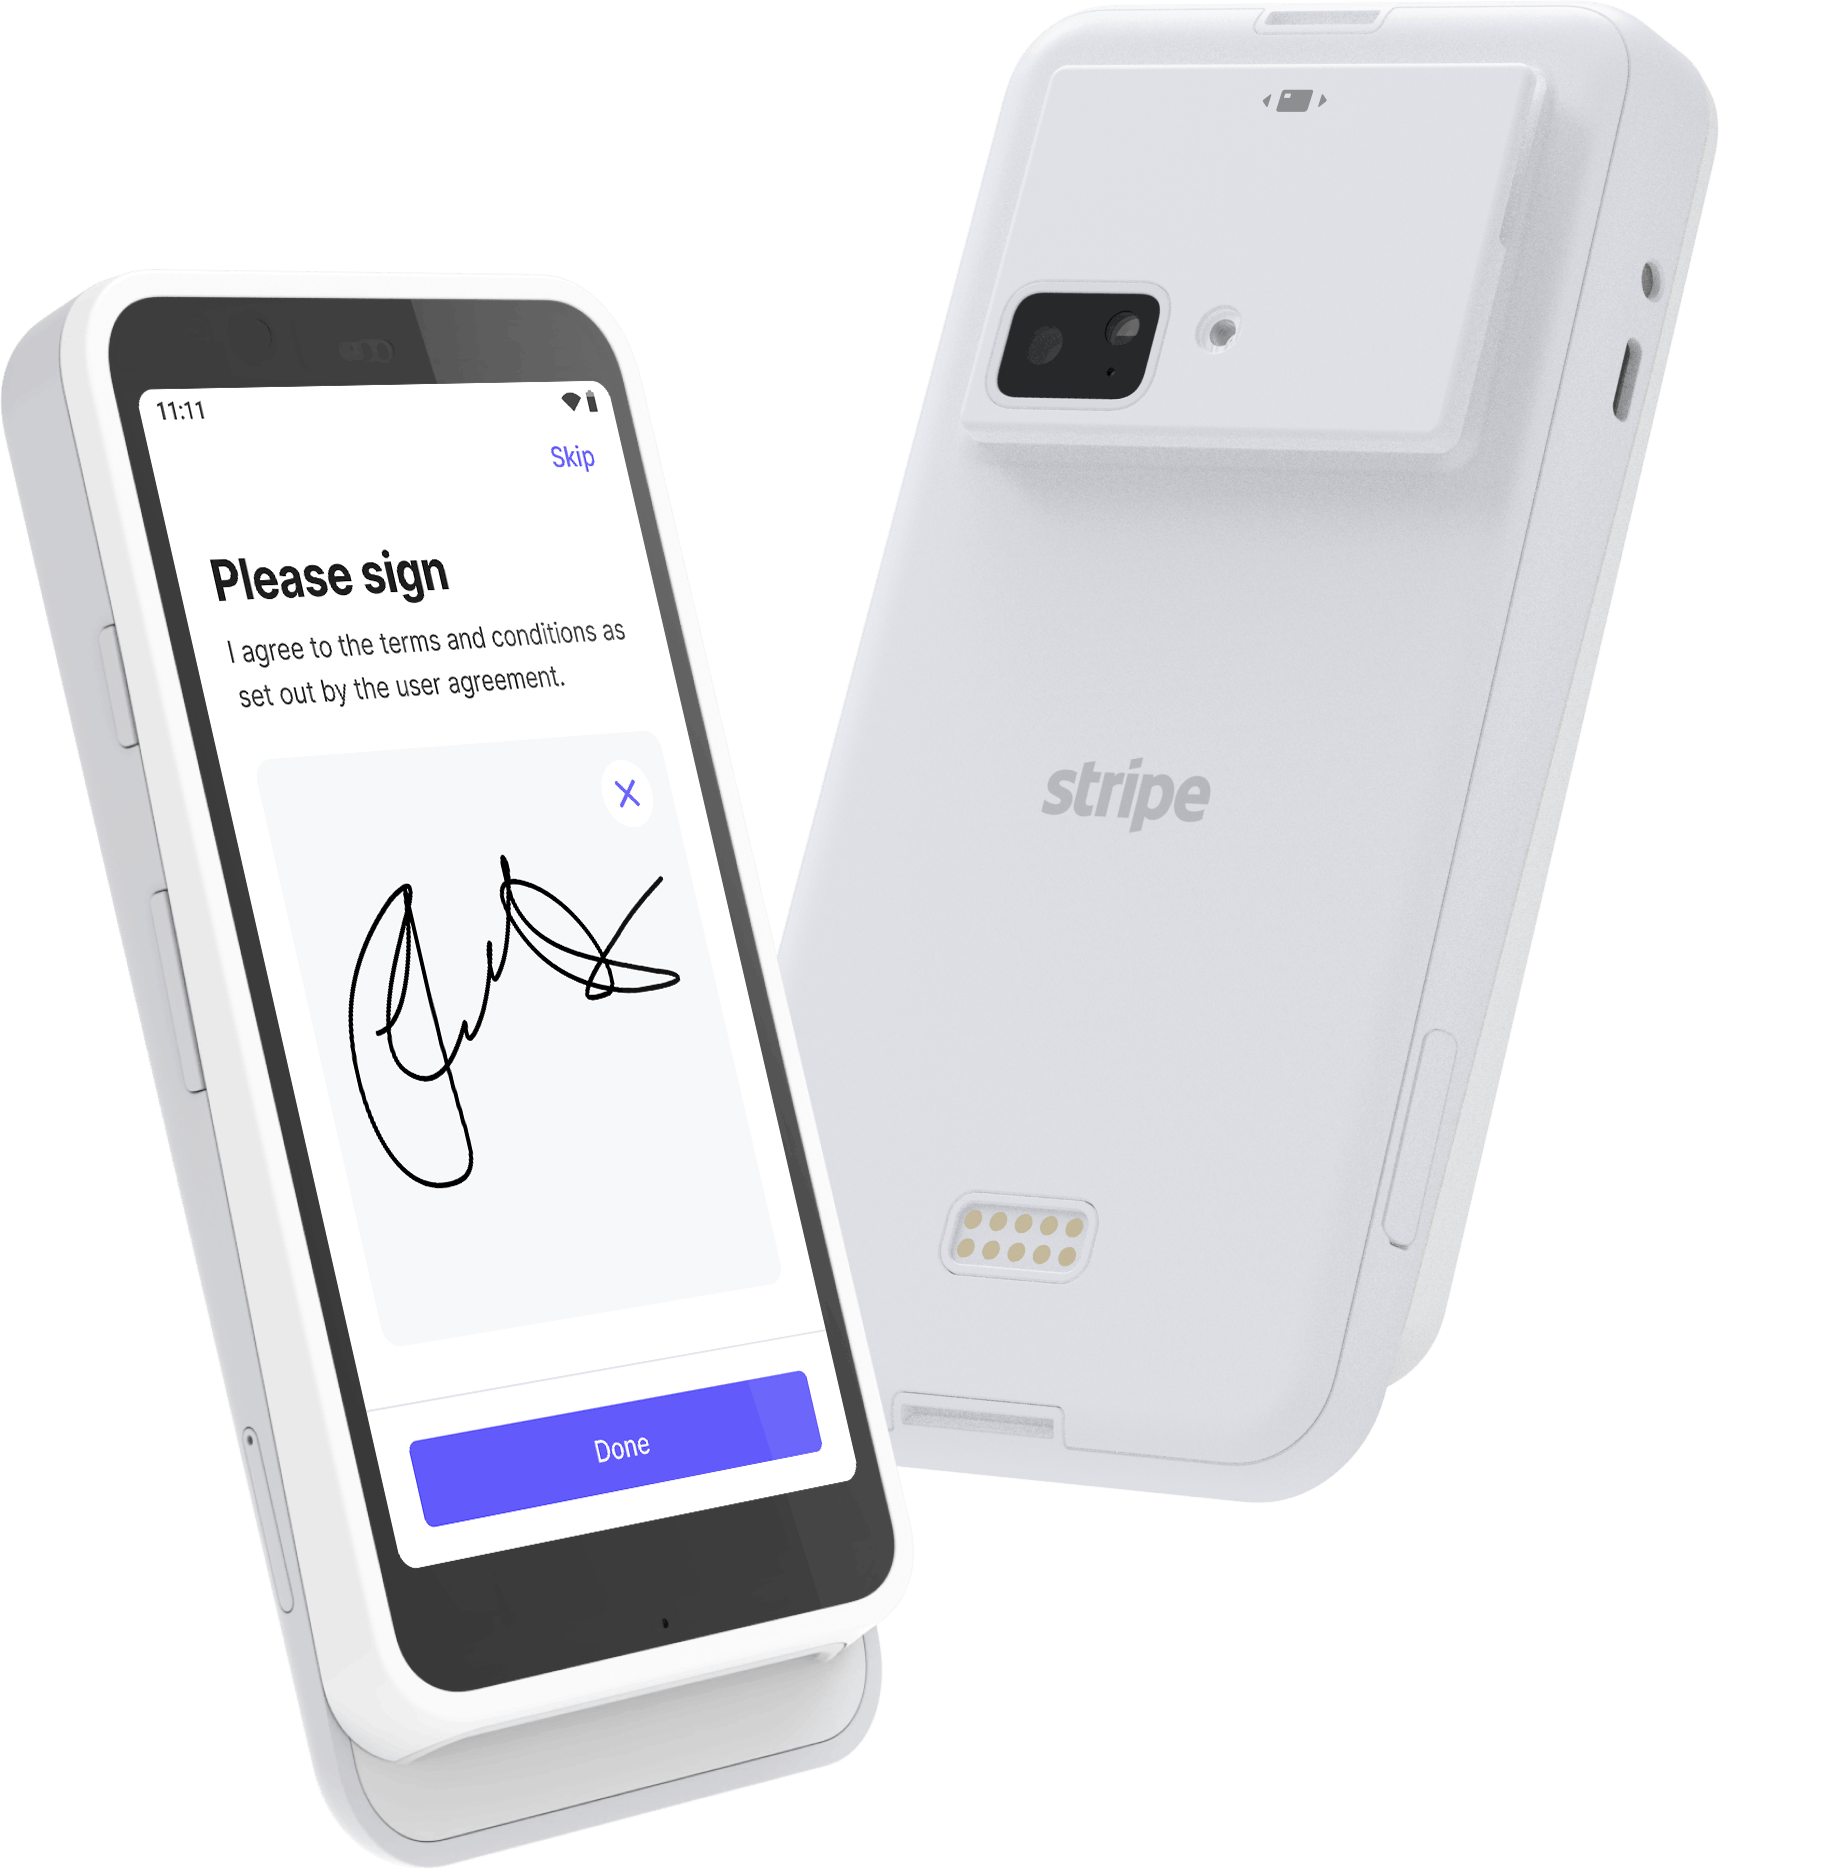
The Stripe Reader S710 is the current card reader recommended for new Bravo card reader setups. It can be used to accept in-person card payments through the Bravo Box Office.
This guide explains how to prepare your S710, connect it to the internet, register it with your Stripe account, and prepare it for use with Bravo.
Before You Begin
Before setting up your reader, make sure you have:
- Your Stripe Reader S710.
- The USB-C charging cable and power adapter supplied with the reader.
- Access to your organization's Stripe account.
- Access to a reliable internet connection.
- Completed your organization's Stripe account setup.
If your Stripe account has not yet been connected to Bravo, follow How to: Set Up Your Stripe Account and Connect It to Bravo.
Important: Registering and setting up your reader does not automatically make it ready for use with the Bravo Box Office. Bravo Arts Solutions must also complete the required payment configuration for your organization. Bravo Support will let you know when your setup is ready for testing.
Steps
1. Charge the Reader
Before using your S710 for the first time, fully charge the reader.
- Connect the supplied USB-C cable to the reader.
- Connect the other end to the supplied power adapter.
- Plug the power adapter into a power outlet.
- Allow the reader to fully charge.
Stripe recommends using the supplied power adapter. Other power adapters or cables may not provide enough power to properly charge the reader.
2. Turn On the Reader
Once the reader is charged:
- Locate the power button on the right side of the reader.
- Press and hold the power button until the screen turns on.
- Allow the reader to finish starting up.
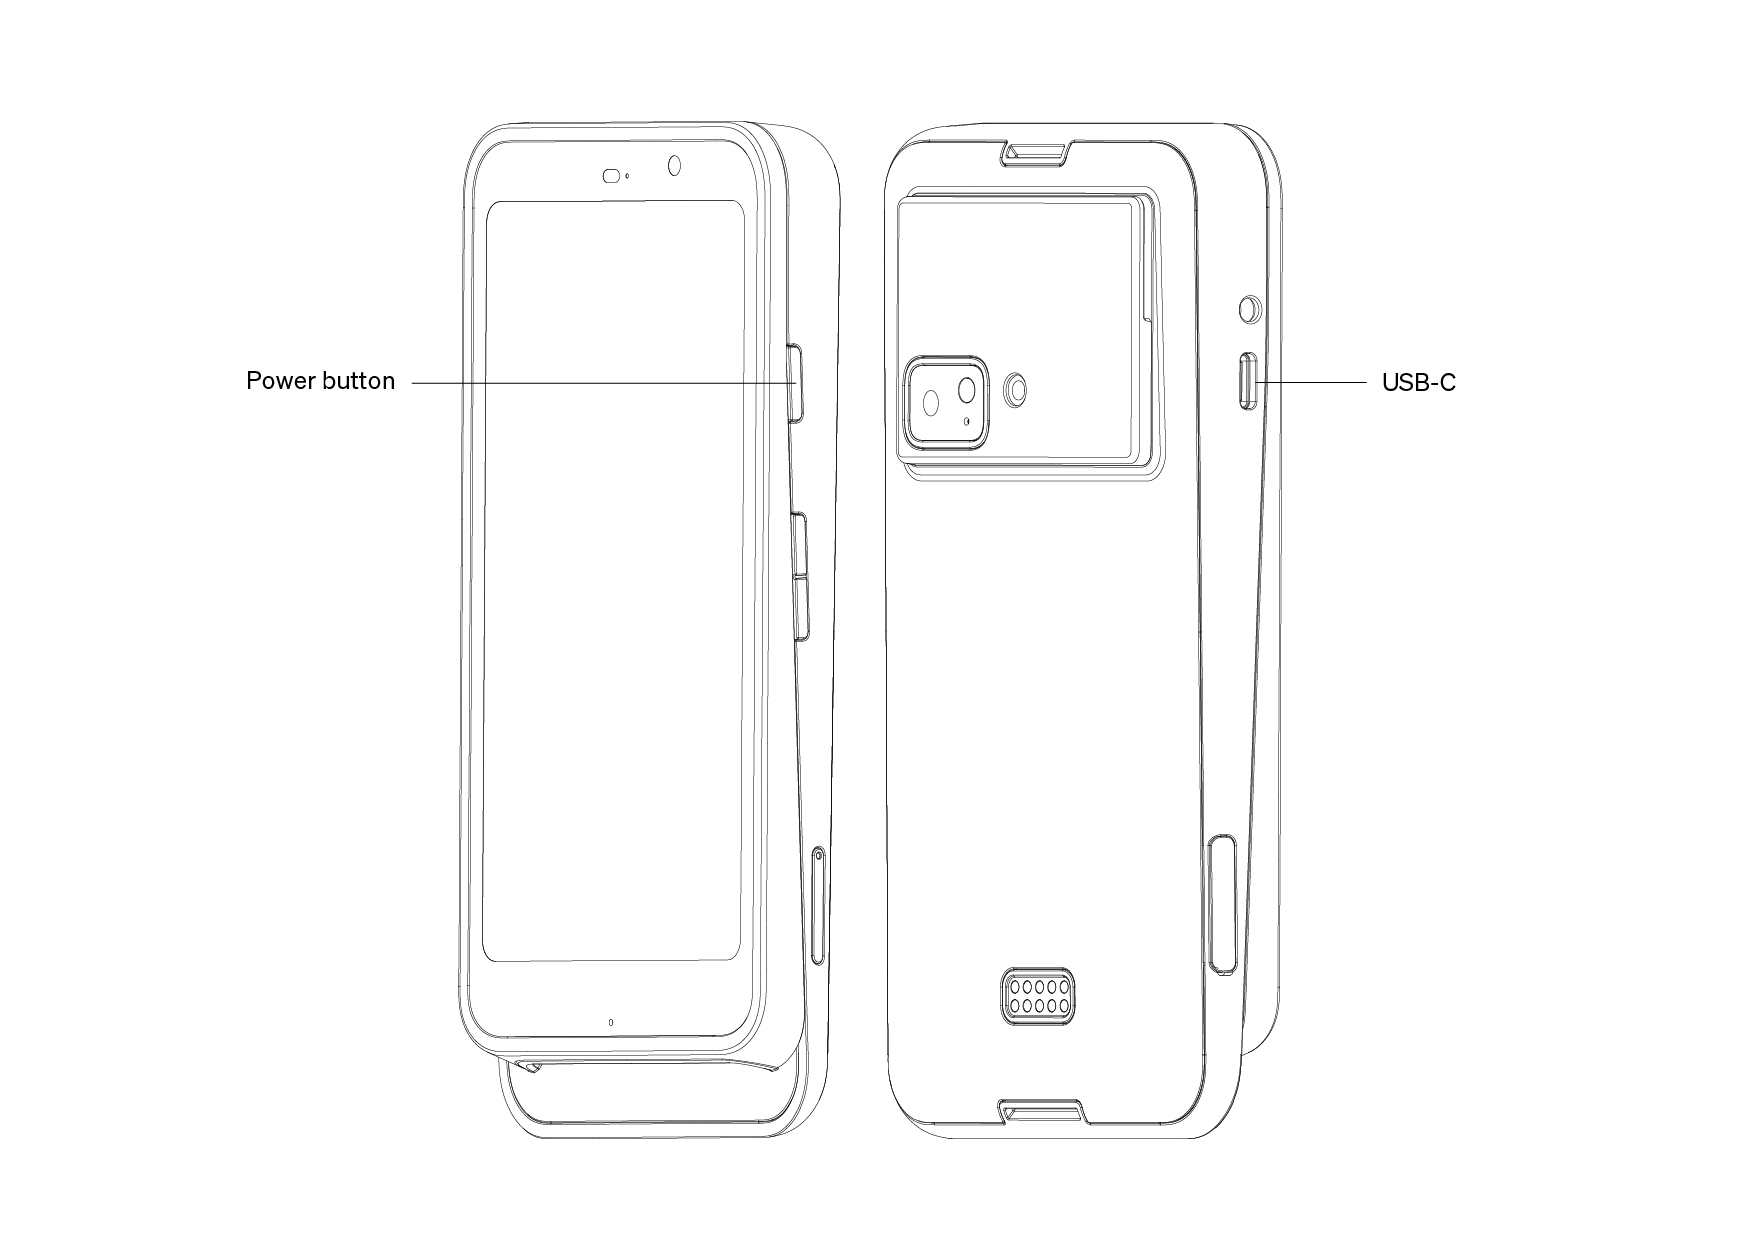
To turn the reader off, press and hold the power button until the power-off option appears on the screen.
Tip: When the reader is not in use, Stripe recommends leaving it plugged in and powered on so it can receive automatic software updates.
3. Access the Reader Settings
To access the S710 settings:
- Swipe from the left edge of the screen toward the right.
- Select Settings.
- Enter the admin PIN: 07139.
- The Admin Options menu will open.
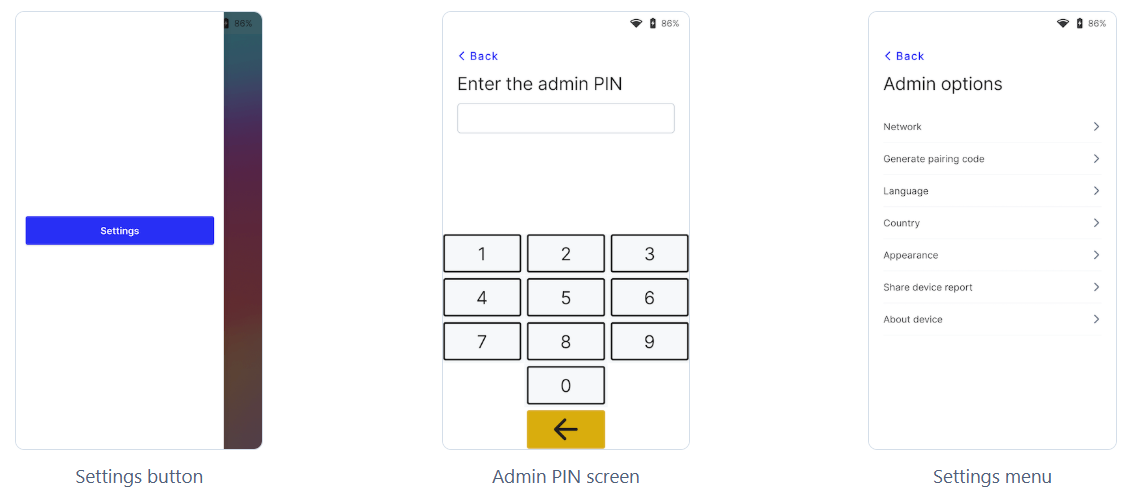
From here, you can access the reader's network and other device settings.
4. Connect the Reader to Wi-Fi
The S710 needs an internet connection to communicate with Stripe.
To connect the reader to Wi-Fi:
- Open the reader's Settings.
- Select Wi-Fi Settings.
- Select your Wi-Fi network.
- Enter the Wi-Fi password.
- Connect to the network.
Make sure the reader has a reliable internet connection in the area where it will normally be used.
5. Register the Reader with Stripe
Before the S710 can be used with Bravo, it must be registered with your organization's Stripe account and assigned to a Stripe Location.
Stripe provides three ways to register a smart reader:
- Pairing Code
- Serial Number
- Order Number
You can choose whichever registration method is most convenient for your organization. Stripe Docs
Option 1: Register Using a Pairing Code | Option 2: Register Using the Serial Number | Option 3: Register Using the Order Number |
If the reader is not yet registered, a pairing code should automatically appear on the reader when it is first set up. If the pairing code is not displayed, you can generate a new one from the reader's Admin Settings.
| You can also register the S710 using its serial number without generating a pairing code. The serial number can be found on the reader, its packaging, or the Stripe hardware order associated with the reader.
| If the reader was ordered directly through your organization's Stripe account, you may also be able to register it using the Stripe hardware order number.
The Order Number method only works when the reader is associated with a hardware order placed by that Stripe account or one of its applicable sub-accounts. |
Tip: Give your reader a clear name that identifies where it will be used, such as Box Office Reader or Concessions Reader. This will make it easier to identify the correct reader when processing payments through Bravo.
For more information about registering Stripe readers, see Stripe — Register Readers.
6. Allow the Reader to Update
After connecting the reader to the internet, leave it powered on so it can complete any available software updates.
We recommend setting up your reader ahead of your first event to allow enough time for any required updates.
7. Notify Bravo Support
Once your reader has been:
- Powered on.
- Connected to the internet.
- Registered with your Stripe account.
- Assigned to the appropriate Stripe Location.
notify Bravo Support that your reader setup is complete.
If you have not already provided Bravo Arts Solutions with access to your Stripe account, follow How to: Set Up Your Stripe Account and Connect It to Bravo.
Bravo Arts Solutions will use the provided access to complete the required payment configuration for your organization.
8. Wait for Bravo to Confirm Your Payment Setup
There is additional configuration that must be completed by Bravo Arts Solutions before the reader can be tested through the Bravo Box Office.
Bravo Support will let you know once the required configuration has been completed and your account is ready for testing.
Important: Please wait for confirmation from Bravo Support before attempting your first card reader transaction through the Bravo Box Office.
9. Test the Reader with Bravo
Once Bravo Support confirms that your payment setup is ready, you can test the S710 through the Bravo Box Office.
Before testing, make sure:
- The reader is powered on.
- The reader is connected to the internet.
- The reader is registered with your Stripe account.
- The reader is assigned to the appropriate Stripe Location.
- Bravo Support has confirmed that your payment configuration is complete.
You can then perform a test Card Reader payment from the Bravo Box Office.
See How to: Process a Card Reader Payment for step-by-step instructions.
Tips & Best Practices
- Set up and test your reader before the day of your first event.
- Fully charge the reader before using it at an event.
- Keep the reader connected to the internet so it can receive software updates.
- If you have multiple readers, use clear names in Stripe so they are easy to identify.
- Make sure each reader is assigned to the appropriate Stripe Location.
- Wait for Bravo Support to confirm that your payment configuration is ready before testing the reader through the Box Office.
FAQ
Do I need to connect my Stripe account to Bravo?
Yes. Your Stripe account must be connected and configured for use with Bravo before you can process Stripe payments through the Bravo Box Office.
See How to: Set Up Your Stripe Account and Connect It to Bravo
Does registering my S710 in Stripe mean it is ready to use with Bravo?
Not yet. After the reader has been registered, Bravo Arts Solutions must complete the required payment configuration for your organization. Bravo Support will confirm when your setup is ready for testing.
Does the S710 need Wi-Fi?
The S710 requires an internet connection to communicate with Stripe. Wi-Fi can be used for your reader connection. The S710 also supports Ethernet and cellular connectivity.
Should I turn off the reader when it is not being used?
Stripe recommends leaving the reader plugged in and powered on when possible so it can receive automatic software updates.
How do I change the Wi-Fi network?
Open the reader's Settings, select Wi-Fi Settings, and select the network you want to use. Connecting to a new Wi-Fi network disconnects the reader from its existing wireless connection.
What if my reader does not appear when I try to process a payment?
First, make sure:
- Bravo Support has confirmed that your payment configuration is complete.
- The reader is powered on.
- The reader is connected to the internet.
- The reader is registered with the correct Stripe account.
- The reader is assigned to a Stripe Location.
If the reader still does not appear, contact Bravo Support for assistance.